Release
This chapter covers releasing your plugin to npm using GitHub Actions. The template includes a complete release workflow that automatically handles building, testing, and publishing.
Release Workflow
Prerequisites
Before releasing, ensure you have completed these requirements:
1. Update Repository Information
You must update the repository URLs in your package.json files to match your actual repository, otherwise you'll encounter a Sigstore provenance verification error during publishing:
npm error 422 Unprocessable Entity - PUT https://registry.npmjs.org/@your-scope%2fyour-package-darwin-x64
Error verifying sigstore provenance bundle: Failed to validate repository information:
package.json: "repository.url" is "git+https://github.com/rspack-contrib/rspack-binding-template.git",
expected to match "https://github.com/your-username/your-repository" from provenance
Update the following files:
package.json- Update therepository.url,bugs.url, andhomepagefieldscrates/binding/package.json- Update therepository.url,bugs.url, andhomepagefields
For example, change:
{
  "repository": {
    "type": "git",
    "url": "git+https://github.com/rspack-contrib/rspack-binding-template.git"
  },
  "bugs": {
    "url": "https://github.com/rspack-contrib/rspack-binding-template/issues"
  },
  "homepage": "https://github.com/rspack-contrib/rspack-binding-template#readme"
}
To:
{
  "repository": {
    "type": "git",
    "url": "git+https://github.com/your-username/your-repository.git"
  },
  "bugs": {
    "url": "https://github.com/your-username/your-repository/issues"
  },
  "homepage": "https://github.com/your-username/your-repository#readme"
}
2. Configure NPM Token
The release workflow requires an Environment secret with NPM_TOKEN to be set in the repository settings:
-
On GitHub, navigate to the main page of the repository.
-
Under your repository name, click Settings. If you cannot see the "Settings" tab, select the dropdown menu, then click Settings.

-
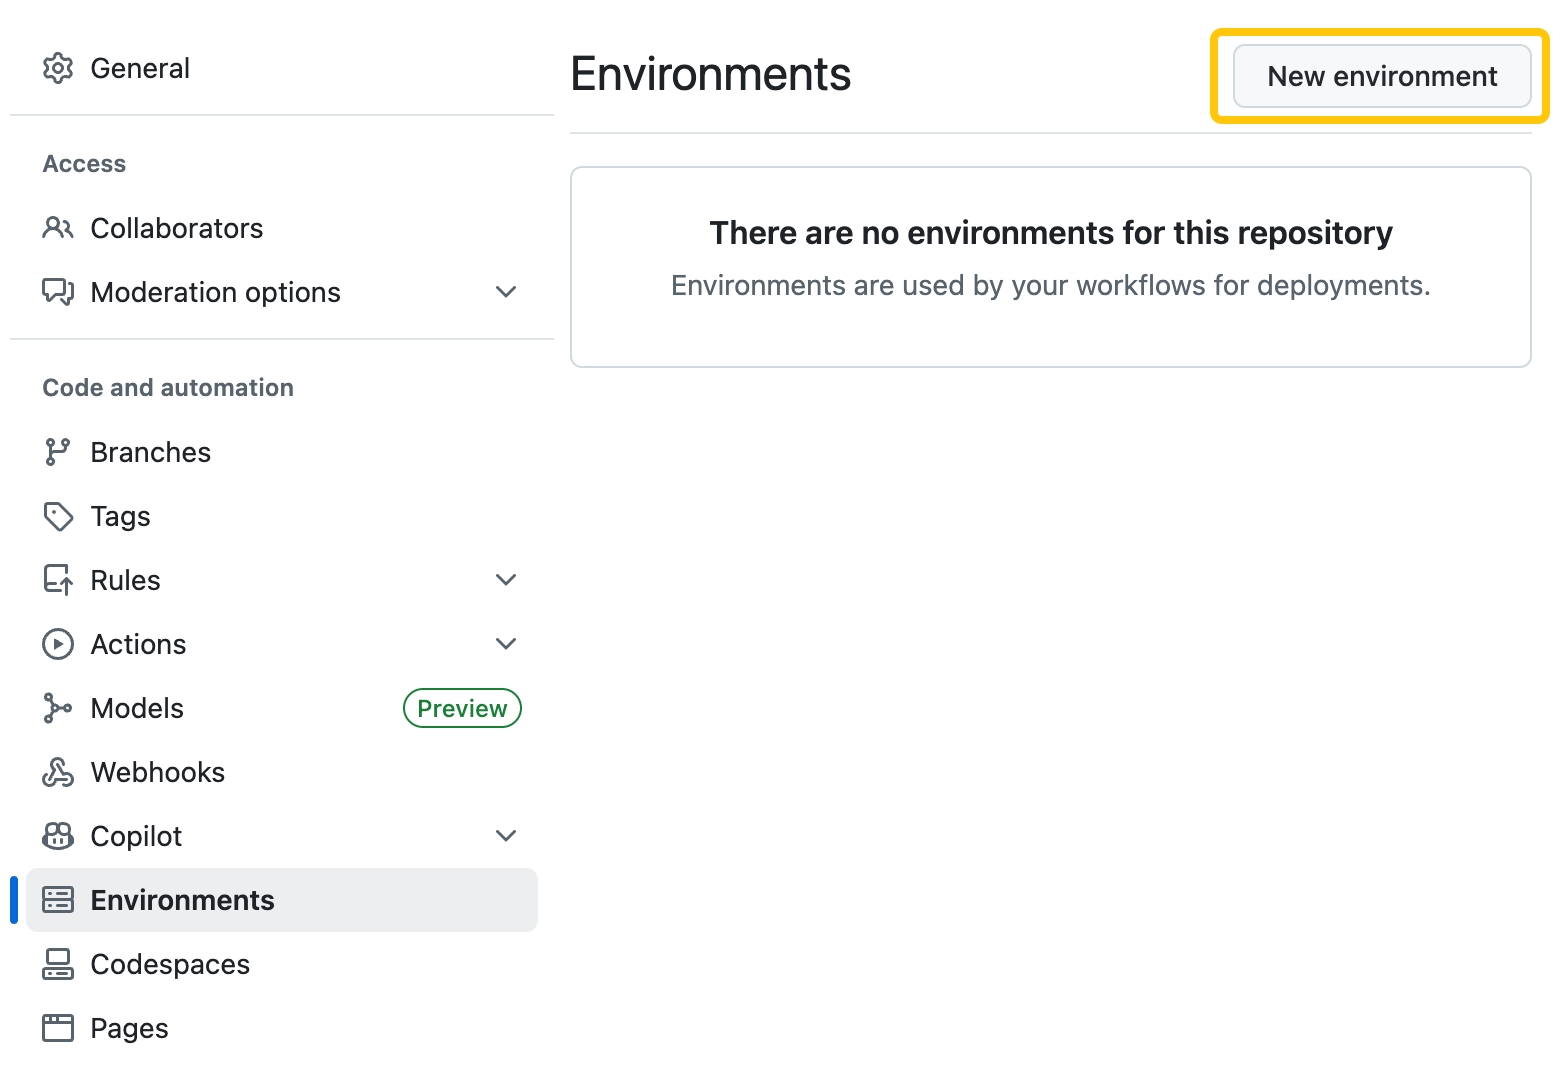
In the left sidebar, click Environments.
-
Click "New environment" to add a new environment.
-
Type
npmas the name for the environment. -
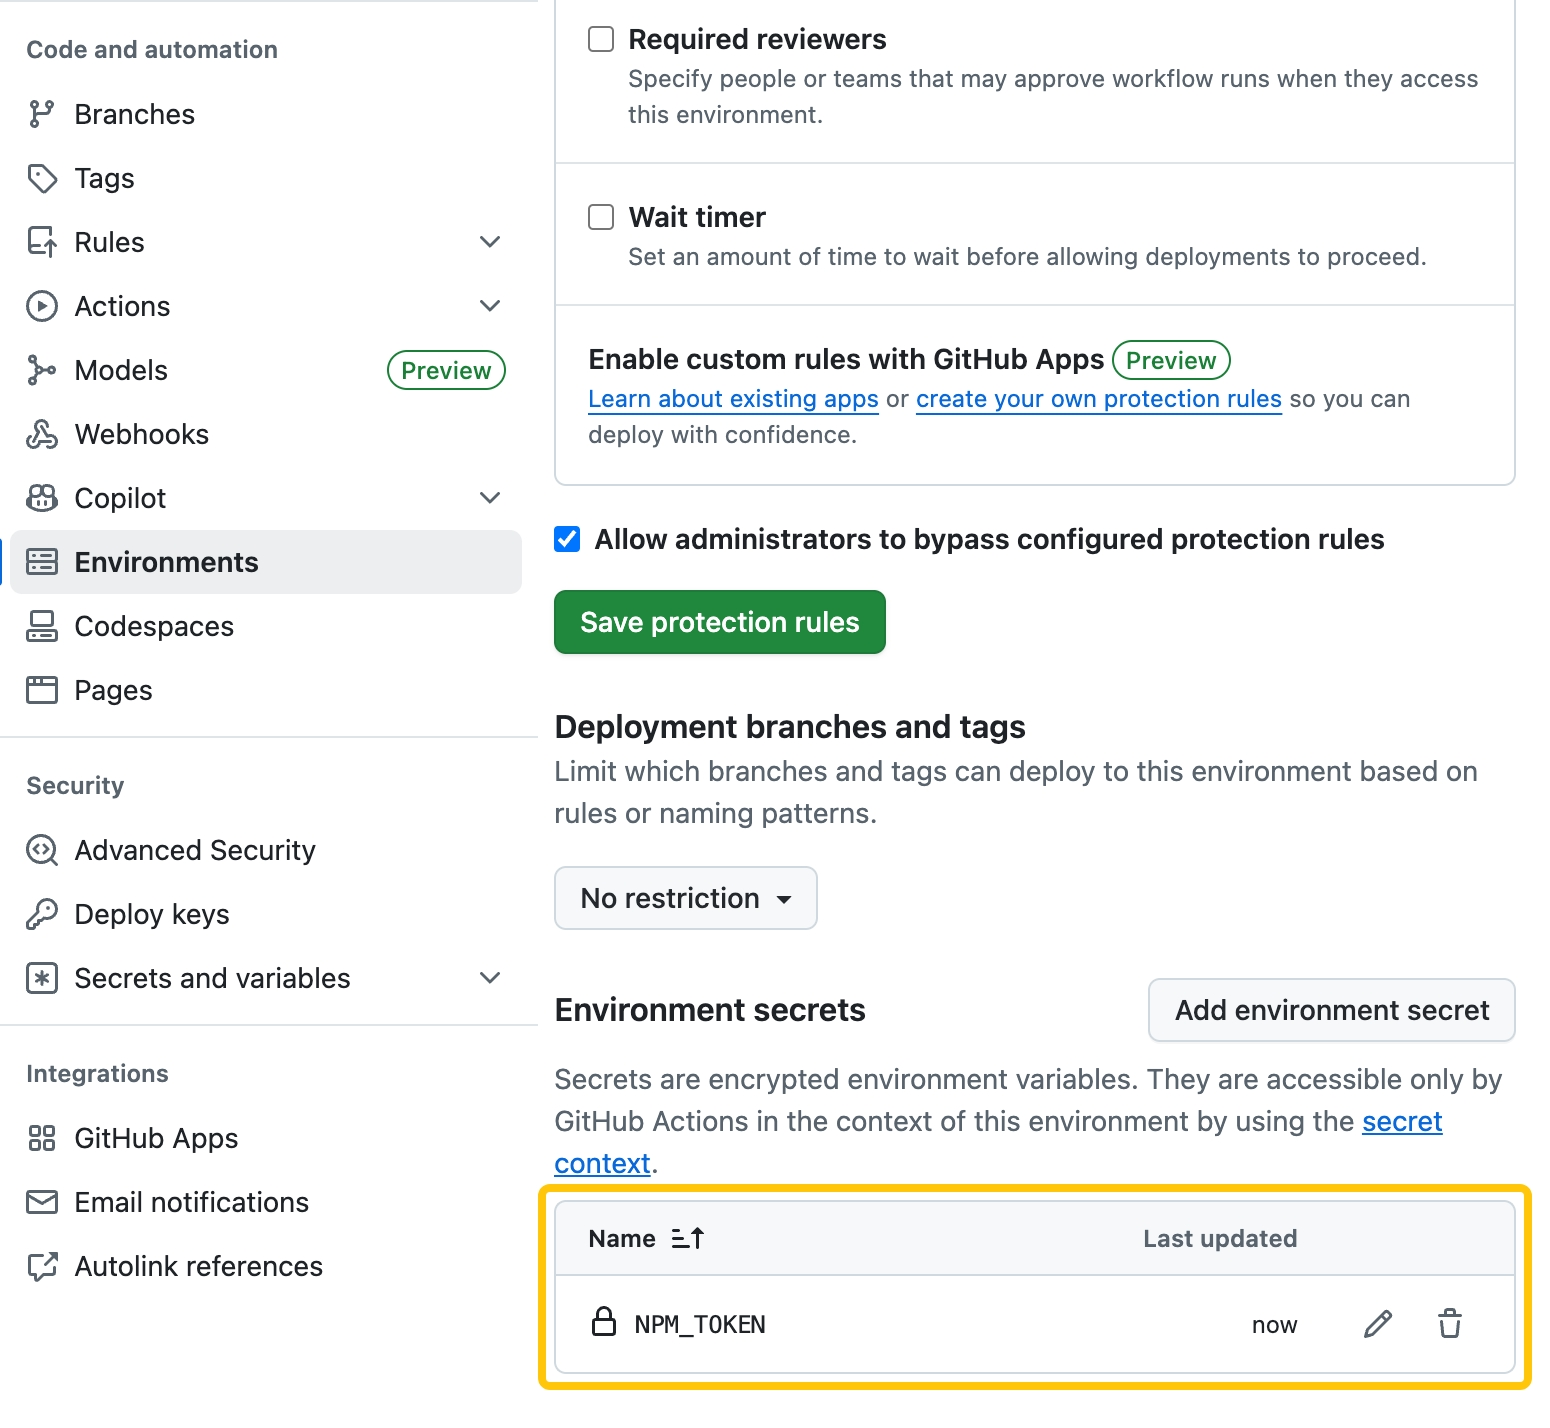
Click "Add environment secret".
-
Enter the name for your secret as "NPM_TOKEN".
-
Enter the value for your secret.
Note: If you don't have a token, you can follow this guide to create a new token.
If you're using "Granular Access Token", make sure to select the "Read and write" scope and select "Only select packages and scopes" and select the scope for the package you want to publish (e.g.
@rspack-template). -
Click Add secret.
1. Create a Release Branch
To release a new version, create a new branch. You can use any branch name, but it's recommended to use a name indicating the version you're releasing.
For example, if you're releasing version 0.0.1, create a branch named release-v0.0.1.
git checkout -b release-v0.0.1
2. Trigger a Version Bump
Before releasing, bump the versions in both package.json and crates/binding/package.json.
rspack-binding-template doesn't include any version bump tool. You can either manually bump the versions in both package.json files or set up any version bump tool.
For example: PR: chore: release v0.0.1
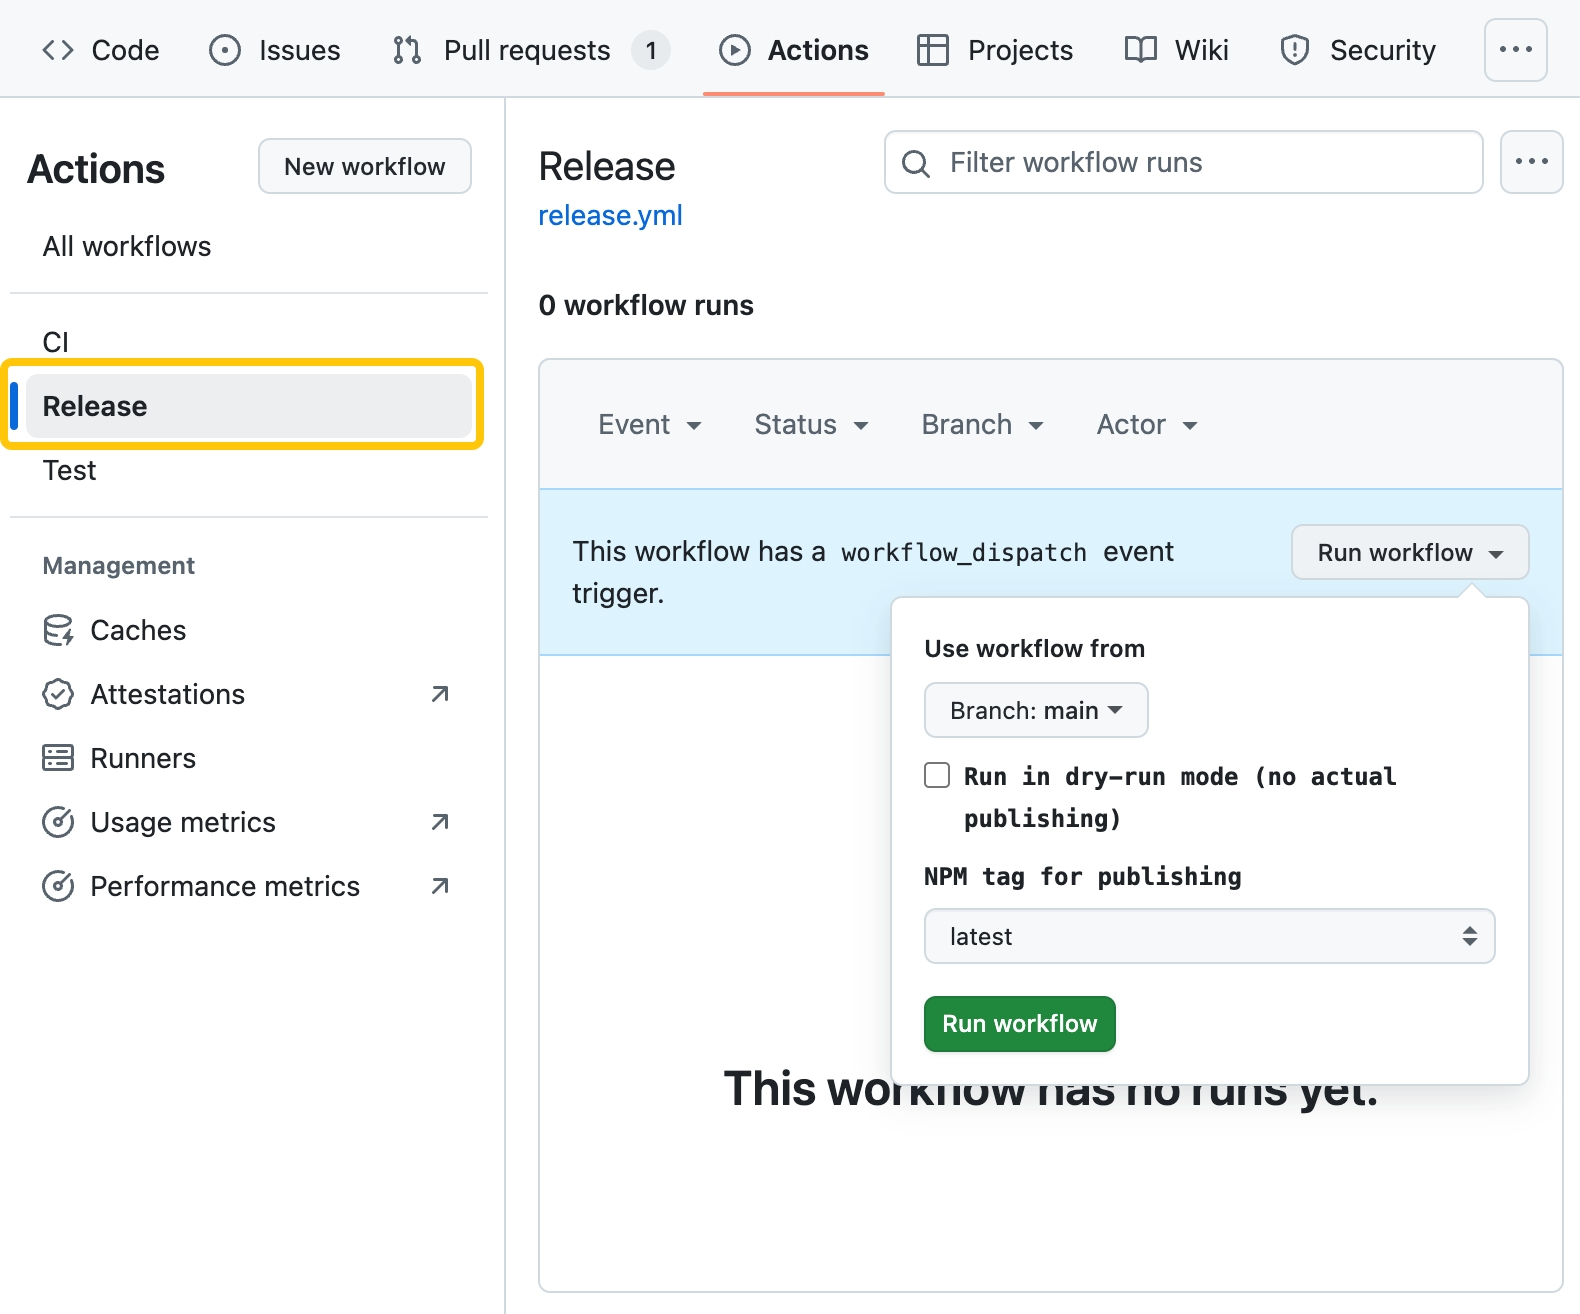
3. Trigger the Release Workflow
- Navigate to Actions → Release in your repository
- Click Run workflow
- Configure options:
- Use workflow from: Select the branch to release from (in this case,
release-v0.0.1) - Dry-run mode: Test without publishing
- NPM tag: Choose
latest,alpha,beta, orcanary
- Use workflow from: Select the branch to release from (in this case,
- Click the Run workflow button in the popover
The workflow will trigger and you can monitor progress in the Actions tab.
For example: Release v0.0.1
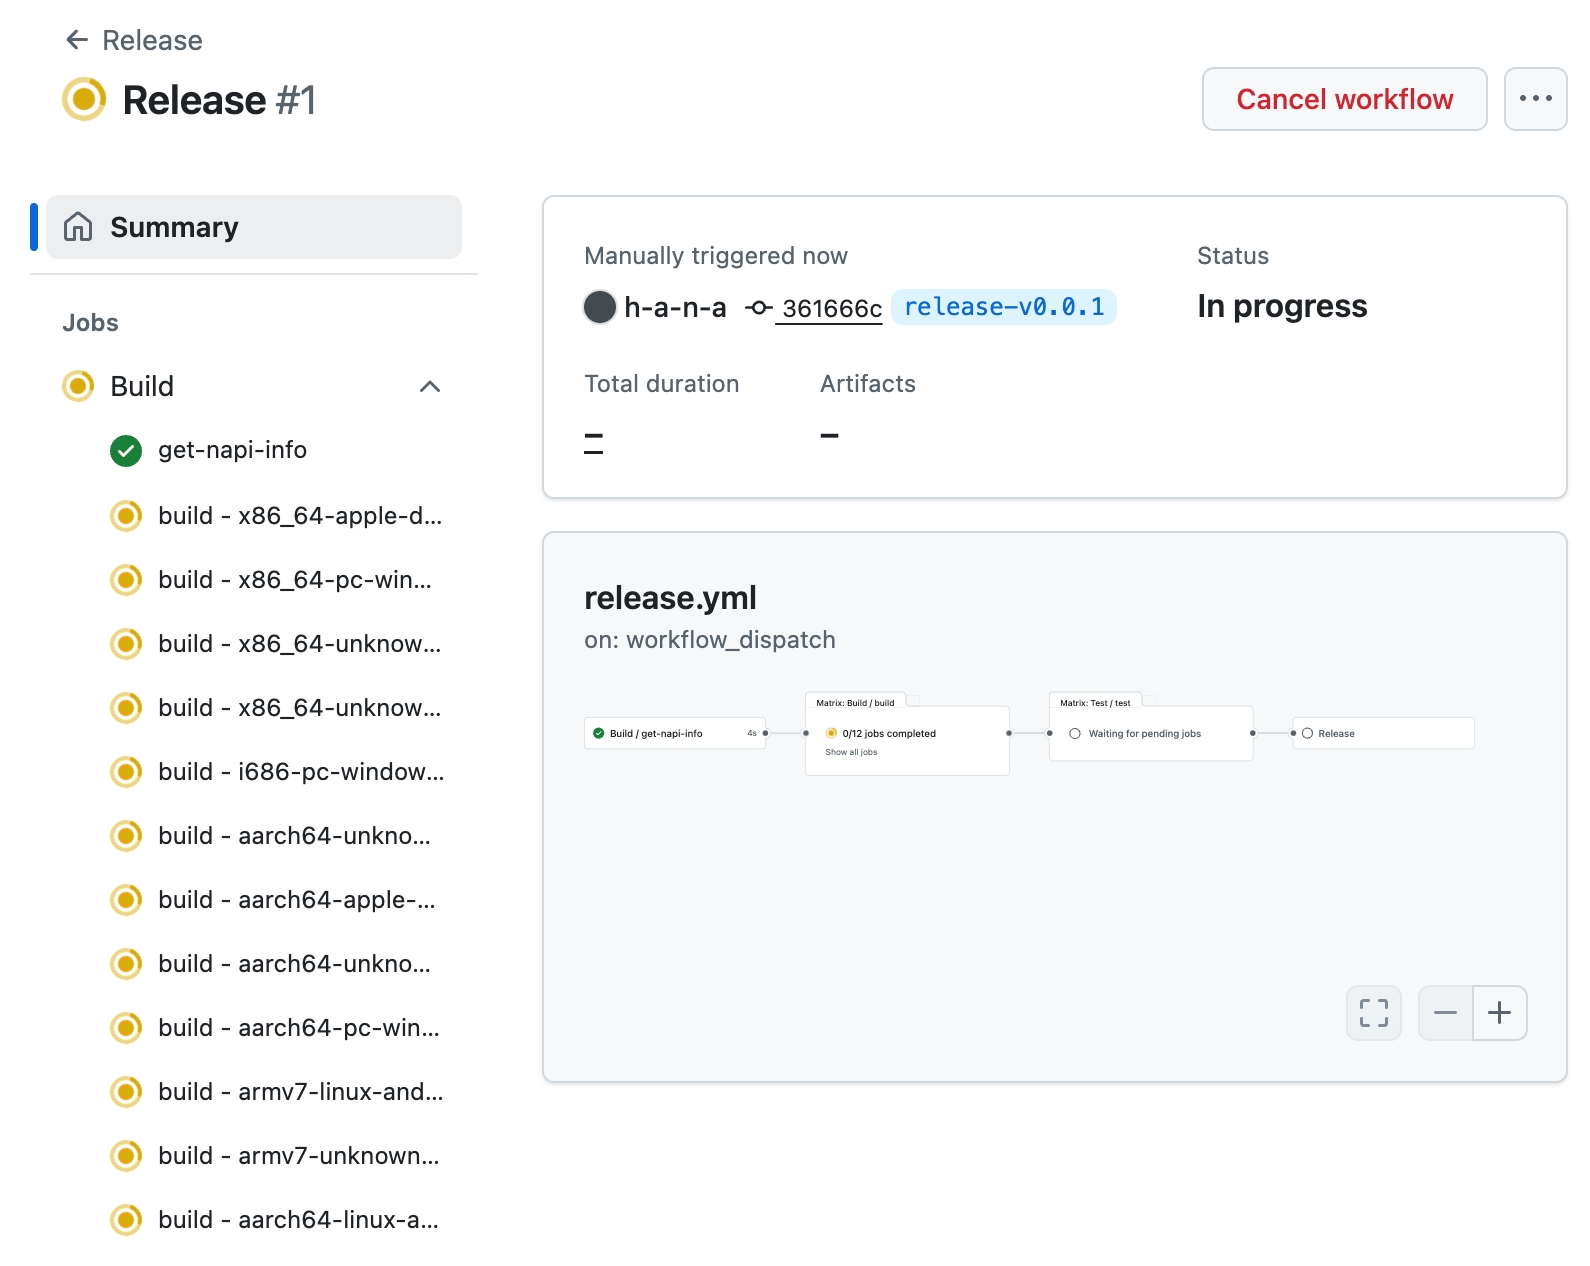
Workflow Deep Dive
The workflow consists of three sequential jobs:
1. Build
Compiles the Node.js addon for all supported targets using the rspack-toolchain build workflow. The build uses the release profile for optimal performance:
[profile.release]
codegen-units = 1
debug = false
lto = "fat"
opt-level = 3
panic = "abort"
strip = true
2. Test
Validates the built bindings using the test suite to ensure everything works correctly before publishing.
3. Release
Publishes the packages to the npm registry:
- Environment Setup: Configures Node.js 22, pnpm, and dependency caching
- Artifact Processing: Downloads compiled bindings and organizes them into platform-specific npm packages using
pnpm napi create-npm-dirsandpnpm napi artifacts - Package Preparation: Configures npm authentication and runs
pnpm napi pre-publishto prepare platform packages - Publishing: Uses
pnpm publish -rto publish all packages with the specified tag
Package Provenance
All packages published through this workflow include npm provenance statements, enhancing supply-chain security by:
- Provenance attestation: Publicly links packages to their source code and build instructions, allowing developers to verify where and how packages were built
- Publish attestation: Generated by the npm registry when packages are published by authorized users
The workflow automatically enables provenance using the --provenance flag. Packages are signed by Sigstore public servers and logged in a public transparency ledger, providing verifiable proof of the package's origin and build process.
Supported Targets
The workflow builds for these targets:
x86_64-apple-darwin
x86_64-pc-windows-msvc
x86_64-unknown-linux-gnu
x86_64-unknown-linux-musl
i686-pc-windows-msvc
aarch64-unknown-linux-gnu
aarch64-apple-darwin
aarch64-unknown-linux-musl
aarch64-pc-windows-msvc
armv7-linux-androideabi
armv7-unknown-linux-gnueabihf
aarch64-linux-android
For the complete list, see rspack-toolchain supported targets.
Manual Release
To trigger a release:
- Navigate to Actions → Release in your repository
- Click Run workflow
- Configure options:
- Dry-run mode: Test without publishing (recommended first)
- NPM tag: Choose
latest,alpha,beta, orcanary
The workflow will automatically build, test, and publish your plugin packages to npm, making them available for installation.